Portland Cutter Restoration Project
My Sleigh as I received it, and as it's currently constructed.
I will add more explanations and details of the methods I have used as time goes on at the moment I just think I should put something of my project on the web having I have searched for such a project and found none.
I welcome your questions or comments at Oreoboy11@AOL.COM
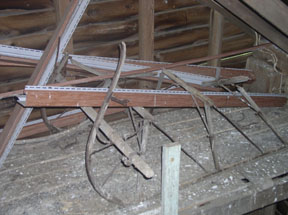
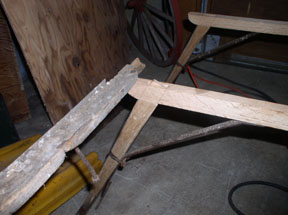
The Original Sleigh
 Throughout
the years I have gone to my grandparents house and explored the barn always
looking at the old sleigh remnants sitting on a shelf in the hay loft.
Over the summer having graduated college and without yet having a job I decided
to attempt to rebuild the old sleigh. As can be seen there was not much left of
the vehicle when I received it and I have determined it seems to be a fairly
simple home built version of a Portland Cutter based on the remnants of the
parts I have received form my grandparents.
Throughout
the years I have gone to my grandparents house and explored the barn always
looking at the old sleigh remnants sitting on a shelf in the hay loft.
Over the summer having graduated college and without yet having a job I decided
to attempt to rebuild the old sleigh. As can be seen there was not much left of
the vehicle when I received it and I have determined it seems to be a fairly
simple home built version of a Portland Cutter based on the remnants of the
parts I have received form my grandparents.
As can be seen all the wood on the sleigh is badly rotten and in need of replacement, yet there was enough of the wood left to use as patterns for new replacement parts and all of the metal the remained is in decent reusable shape.
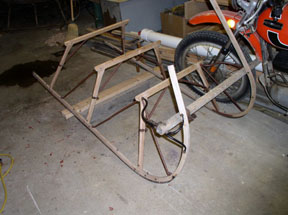
Beginning Construction
To begin the project I disassembled the original sleigh and
began making copies of the legs and knees to be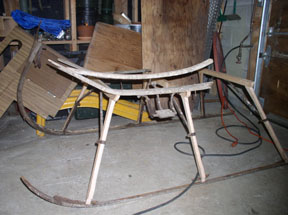 assembled and used when I learn how to bend new runners. The new knees and legs
fit together well but I can see a great progression in their stability from the
first mortis and tennon to the last set I made. As U can see from the pictures I
then assembled the sets and mounted them on the original runners to see how they
would fit together.
assembled and used when I learn how to bend new runners. The new knees and legs
fit together well but I can see a great progression in their stability from the
first mortis and tennon to the last set I made. As U can see from the pictures I
then assembled the sets and mounted them on the original runners to see how they
would fit together.
Bending Runners
At this point I found I was in a rather tight spot as to I
needed a set of runners and had no ideal how to bend wood. However after about
thirty minutes online and a little searching the problem was solved. The next
day I headed off to Homedepo and purchased a piece of 10' long 4" PVC pipe and
made a boiler out of paint cans and
 a
Colman stove. I will say it has not been an easy process due
a
Colman stove. I will say it has not been an easy process due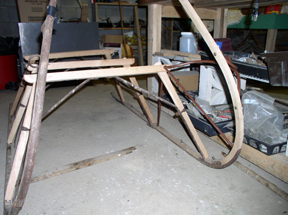 to cold weather and a lack of warm space to bend wood. I tried three times
before I got a successful bend for a runner minus the dash bend. I simply was
not fast enough to do both bends at once so I decided to copy another cutter I
have with a removable dash. As can be seen
to cold weather and a lack of warm space to bend wood. I tried three times
before I got a successful bend for a runner minus the dash bend. I simply was
not fast enough to do both bends at once so I decided to copy another cutter I
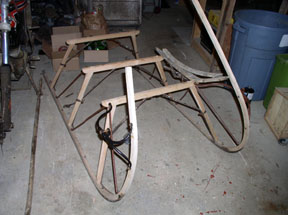
have with a removable dash. As can be seen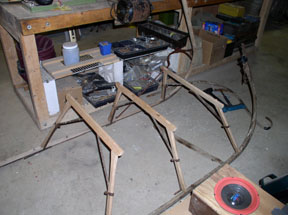 by the pictures my initial assembly of my first runner and my knees produced a
convincingly satisfactory copy of the original sleigh. Here it is just assembled
with the wheel bolts holding it to the runner and the metal pieces lightly
bolted in place. I used new wheel bolts I purchased from a shop in Lancaster PA
as well as some I found in my grandfathers shop. It took a good month before I
got around to making a second runner and assembling the sleigh any more. On
Thanksgiving day it was fairly warm and I decided to try bending another
by the pictures my initial assembly of my first runner and my knees produced a
convincingly satisfactory copy of the original sleigh. Here it is just assembled
with the wheel bolts holding it to the runner and the metal pieces lightly
bolted in place. I used new wheel bolts I purchased from a shop in Lancaster PA
as well as some I found in my grandfathers shop. It took a good month before I
got around to making a second runner and assembling the sleigh any more. On
Thanksgiving day it was fairly warm and I decided to try bending another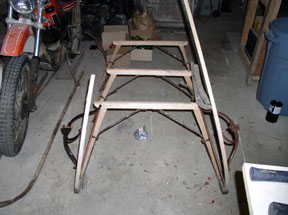 runner and had success. So after a week of extra drying for the wood I made the
appropriate joints and joined the metal runner to the wood with more wheel bolts
to then be assembled with the rest of the sleigh.
runner and had success. So after a week of extra drying for the wood I made the
appropriate joints and joined the metal runner to the wood with more wheel bolts
to then be assembled with the rest of the sleigh.
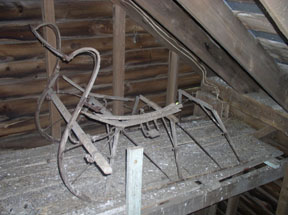
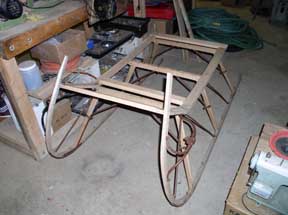
 Here it
can be seen with all the metal work in place and ready to be drilled, bolted, and
then eventually be riveted in place where proper. Some pieces from the original
sleigh can be seen in the picture where I was ascertaining how to make new body
floor sections.
Here it
can be seen with all the metal work in place and ready to be drilled, bolted, and
then eventually be riveted in place where proper. Some pieces from the original
sleigh can be seen in the picture where I was ascertaining how to make new body
floor sections.
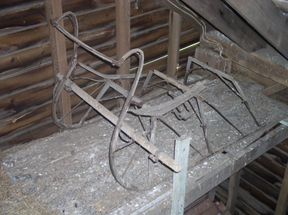
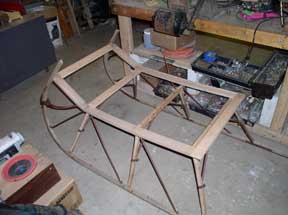
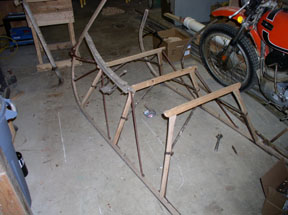 At
this point the project looks convincingly like a sleigh again and is extremely
rigid considering it is not yet bolted together, pinned, or glued.
At
this point the project looks convincingly like a sleigh again and is extremely
rigid considering it is not yet bolted together, pinned, or glued.
Final assembly of Running gear
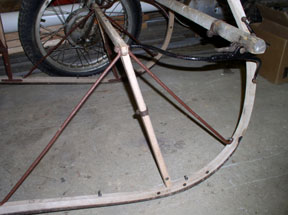
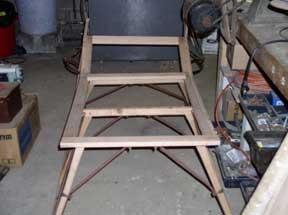
Here the runners and knees are mated together with the metal
work and with one another. The legs and knees have both been glued and pined
together with a dowel just as the original had
been.
Also the inner metal work has been carriage bolted in place and riveted to the
knees and runners as it was originally assembled. Unfortunately I cracked one
runner during the riveting process, as I hammered out the last rivet on the
vehicle it split a portion of the back end of the runner off. However I managed
to easily glue and brad the section back in place. The clamp can be seen in the
above picture behind the last set of legs.
The body
I have begun work on a body for my sleigh based on the little remnants I had and research I have done online. However I have not found any sleighs with similar construction as this. I have had some success and some failure as I had the main body rails bent and cut for the frame and realized I forgot to notch them for the side panels. In the process of notching out the rails I accidentally ruined one and must bend new ones.
More pictures to come soon.
Please send any questions or comments to Oreoboy11@AOL.COM